
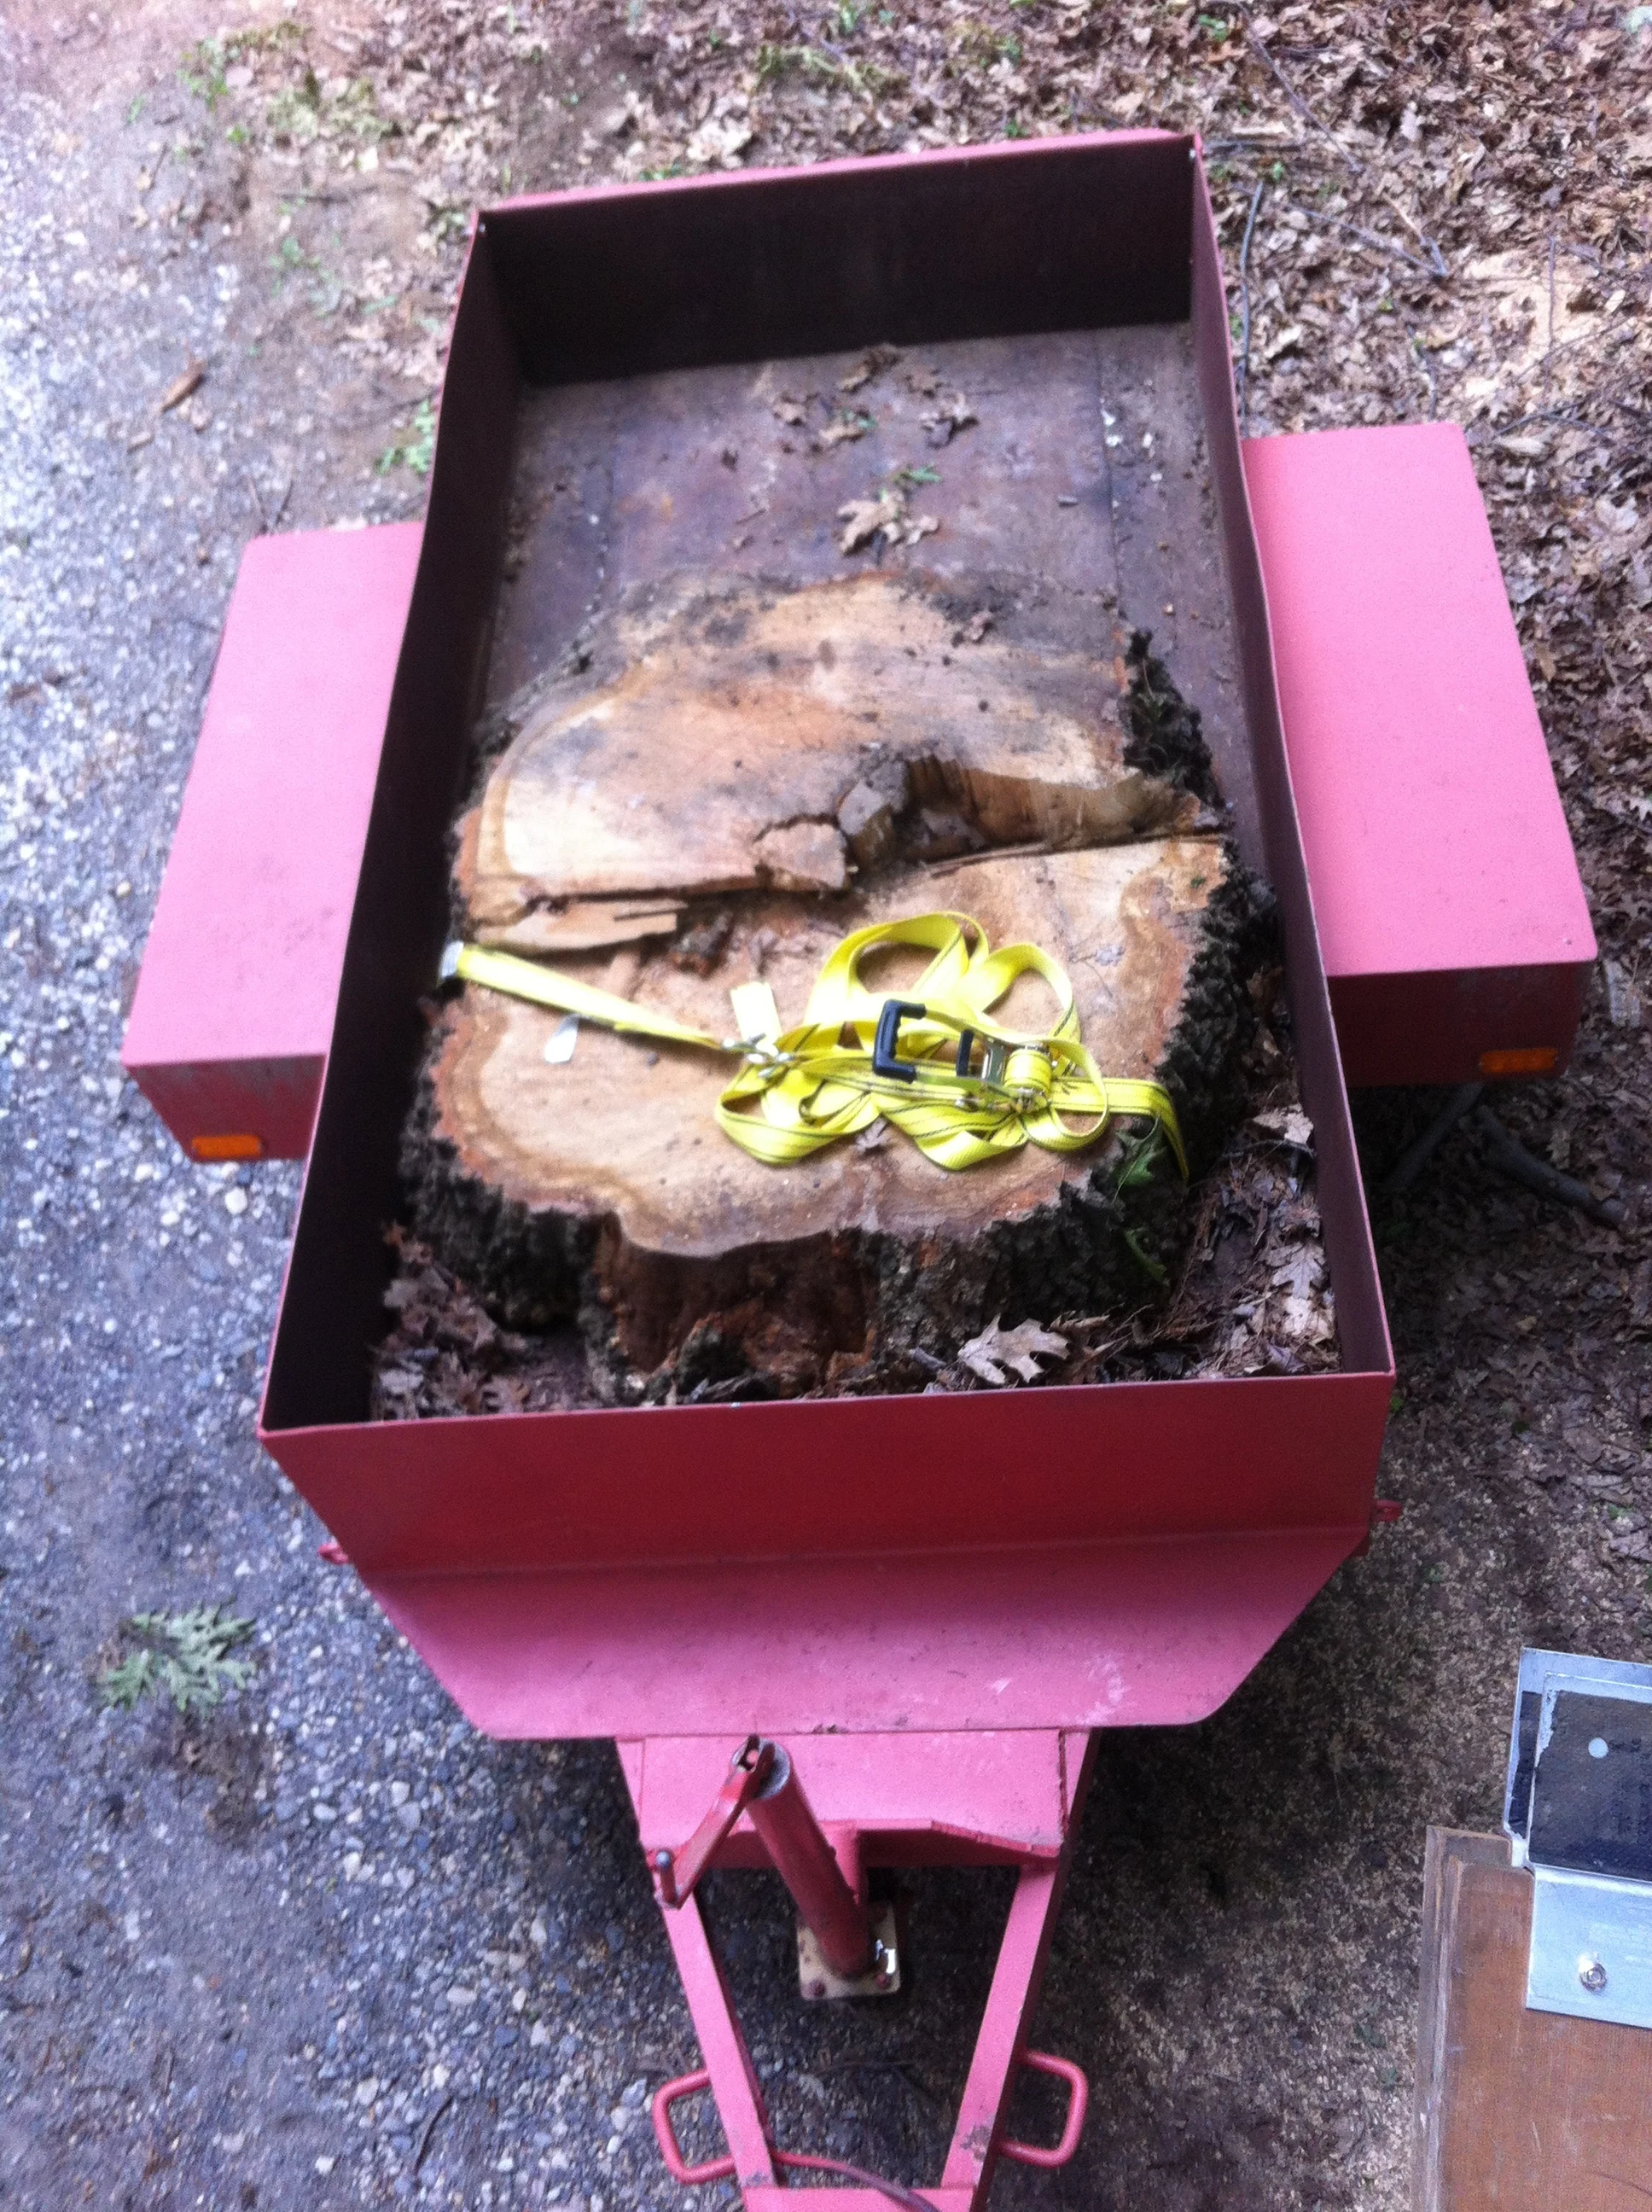
I was asked by Clay if I was interested in a large stump of wood that BGE had left behind after taking a tree down. The location the tree was standing for 103 years was 39°42'40.2"N 76°48'34.2"W. The white oak tree round is about 4 foot in diameter. This was on June of 2014. I bought it home in my little red wagon with some help from Clay. I brought is into the basement and hung it up to dry for a year and a half.
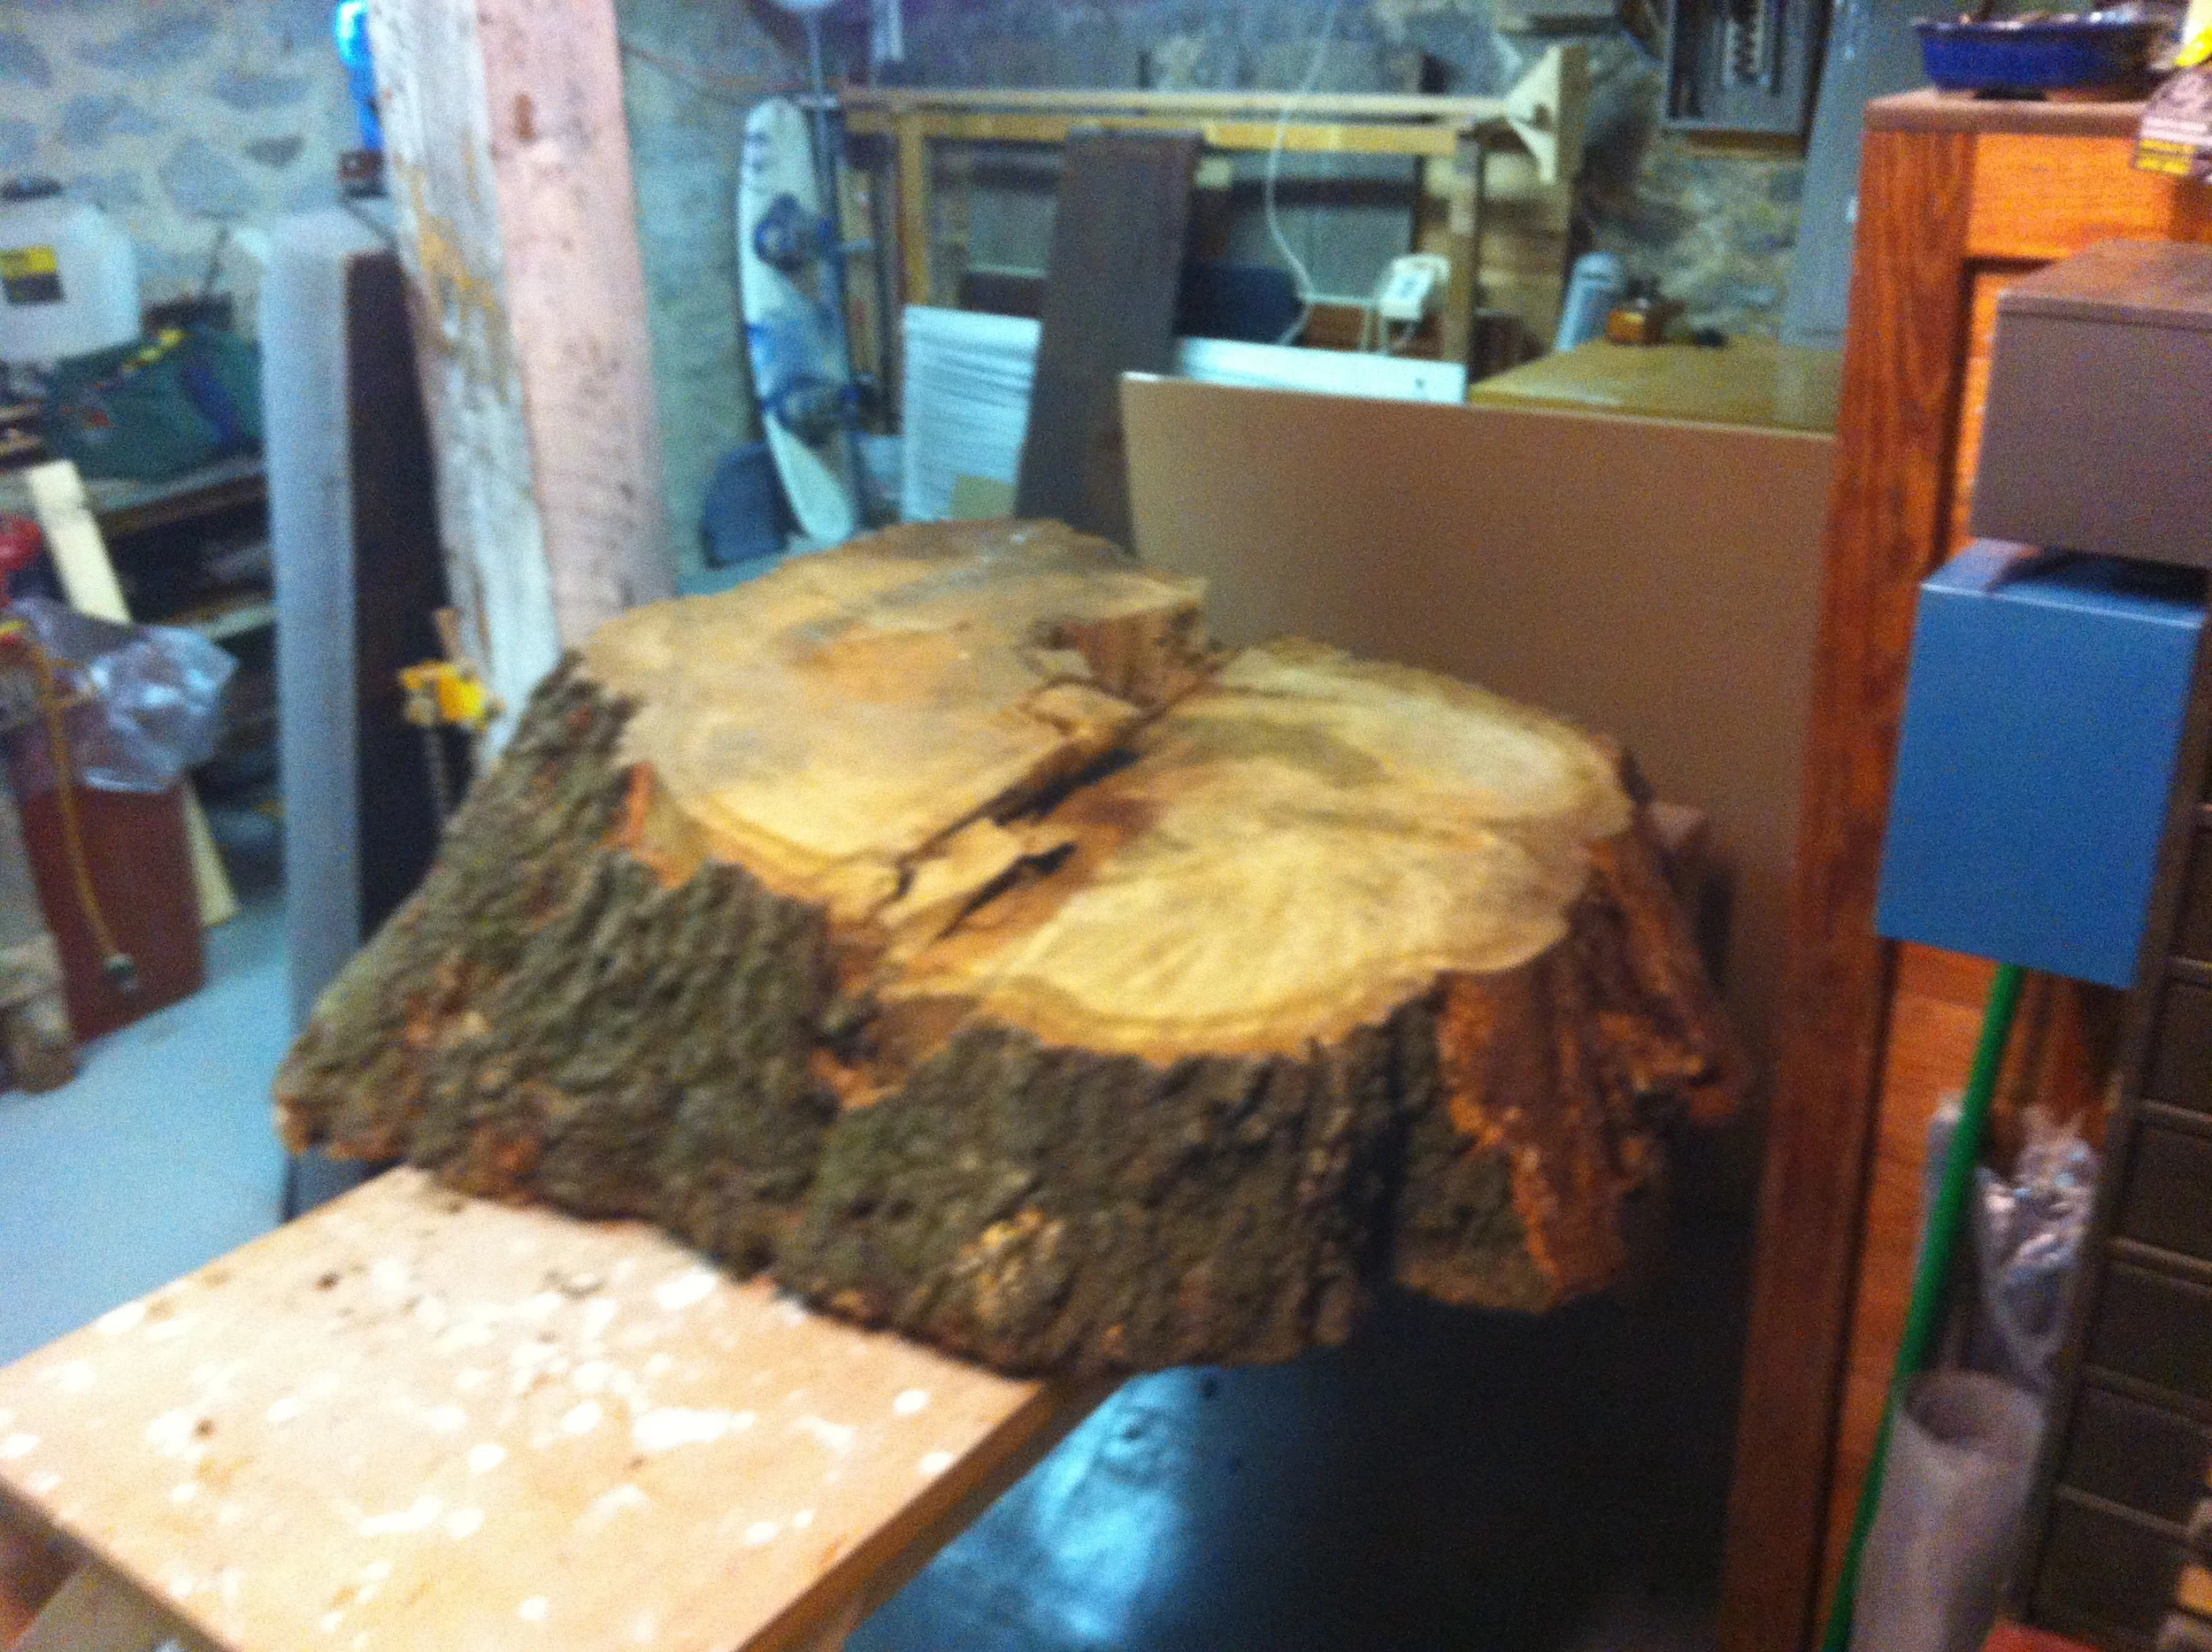
I used my chainsaw to take off a little off the top. As it was drying I removed the bark. I was able to get the stump onto the table and build a trolley for the router.
I used the router to flatten the top and bottom of the stump. I took off about 4 inches leaving a final thickness of 6 inches. I am going to attach a 3/4 inch piece of plywood to the bottom using urethane glue and screws. The table legs are still a question. I am going to add lights pointing up through the voids for more interest. I am also going to use a bar top epoxy coating to finish the top.


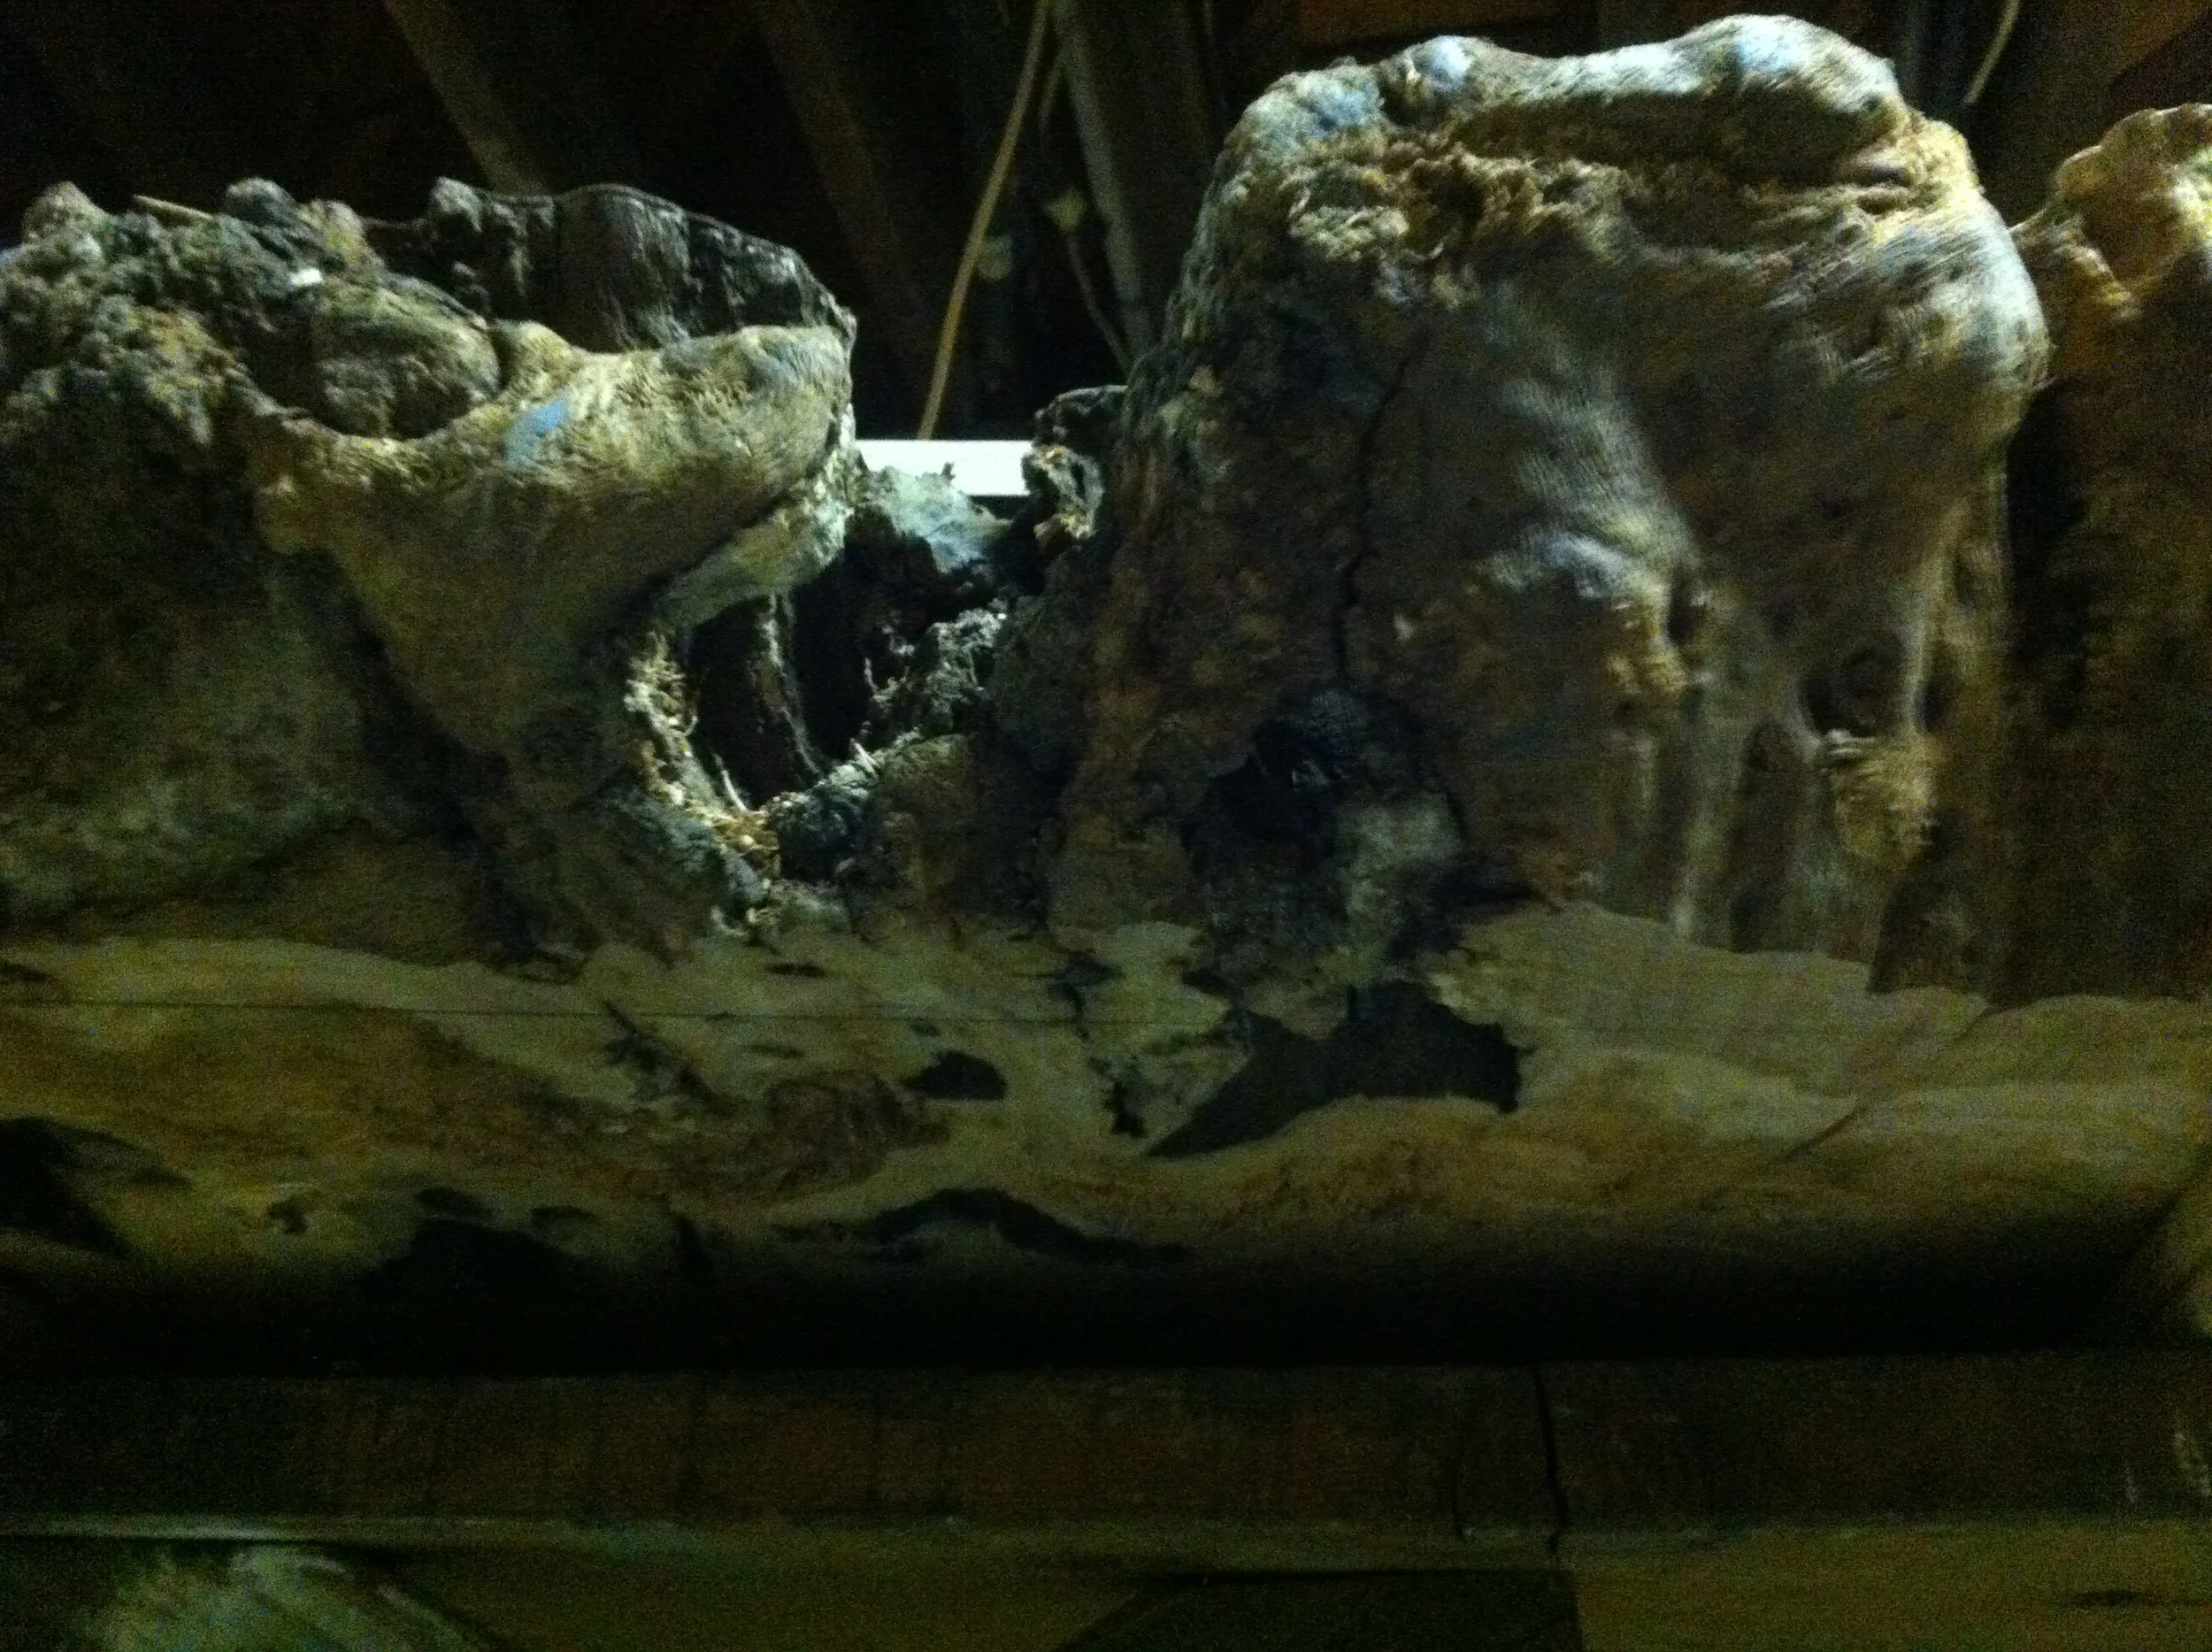
While the stump was upside down I cut some thin plexiglass and installed it into the voids of the top surface.
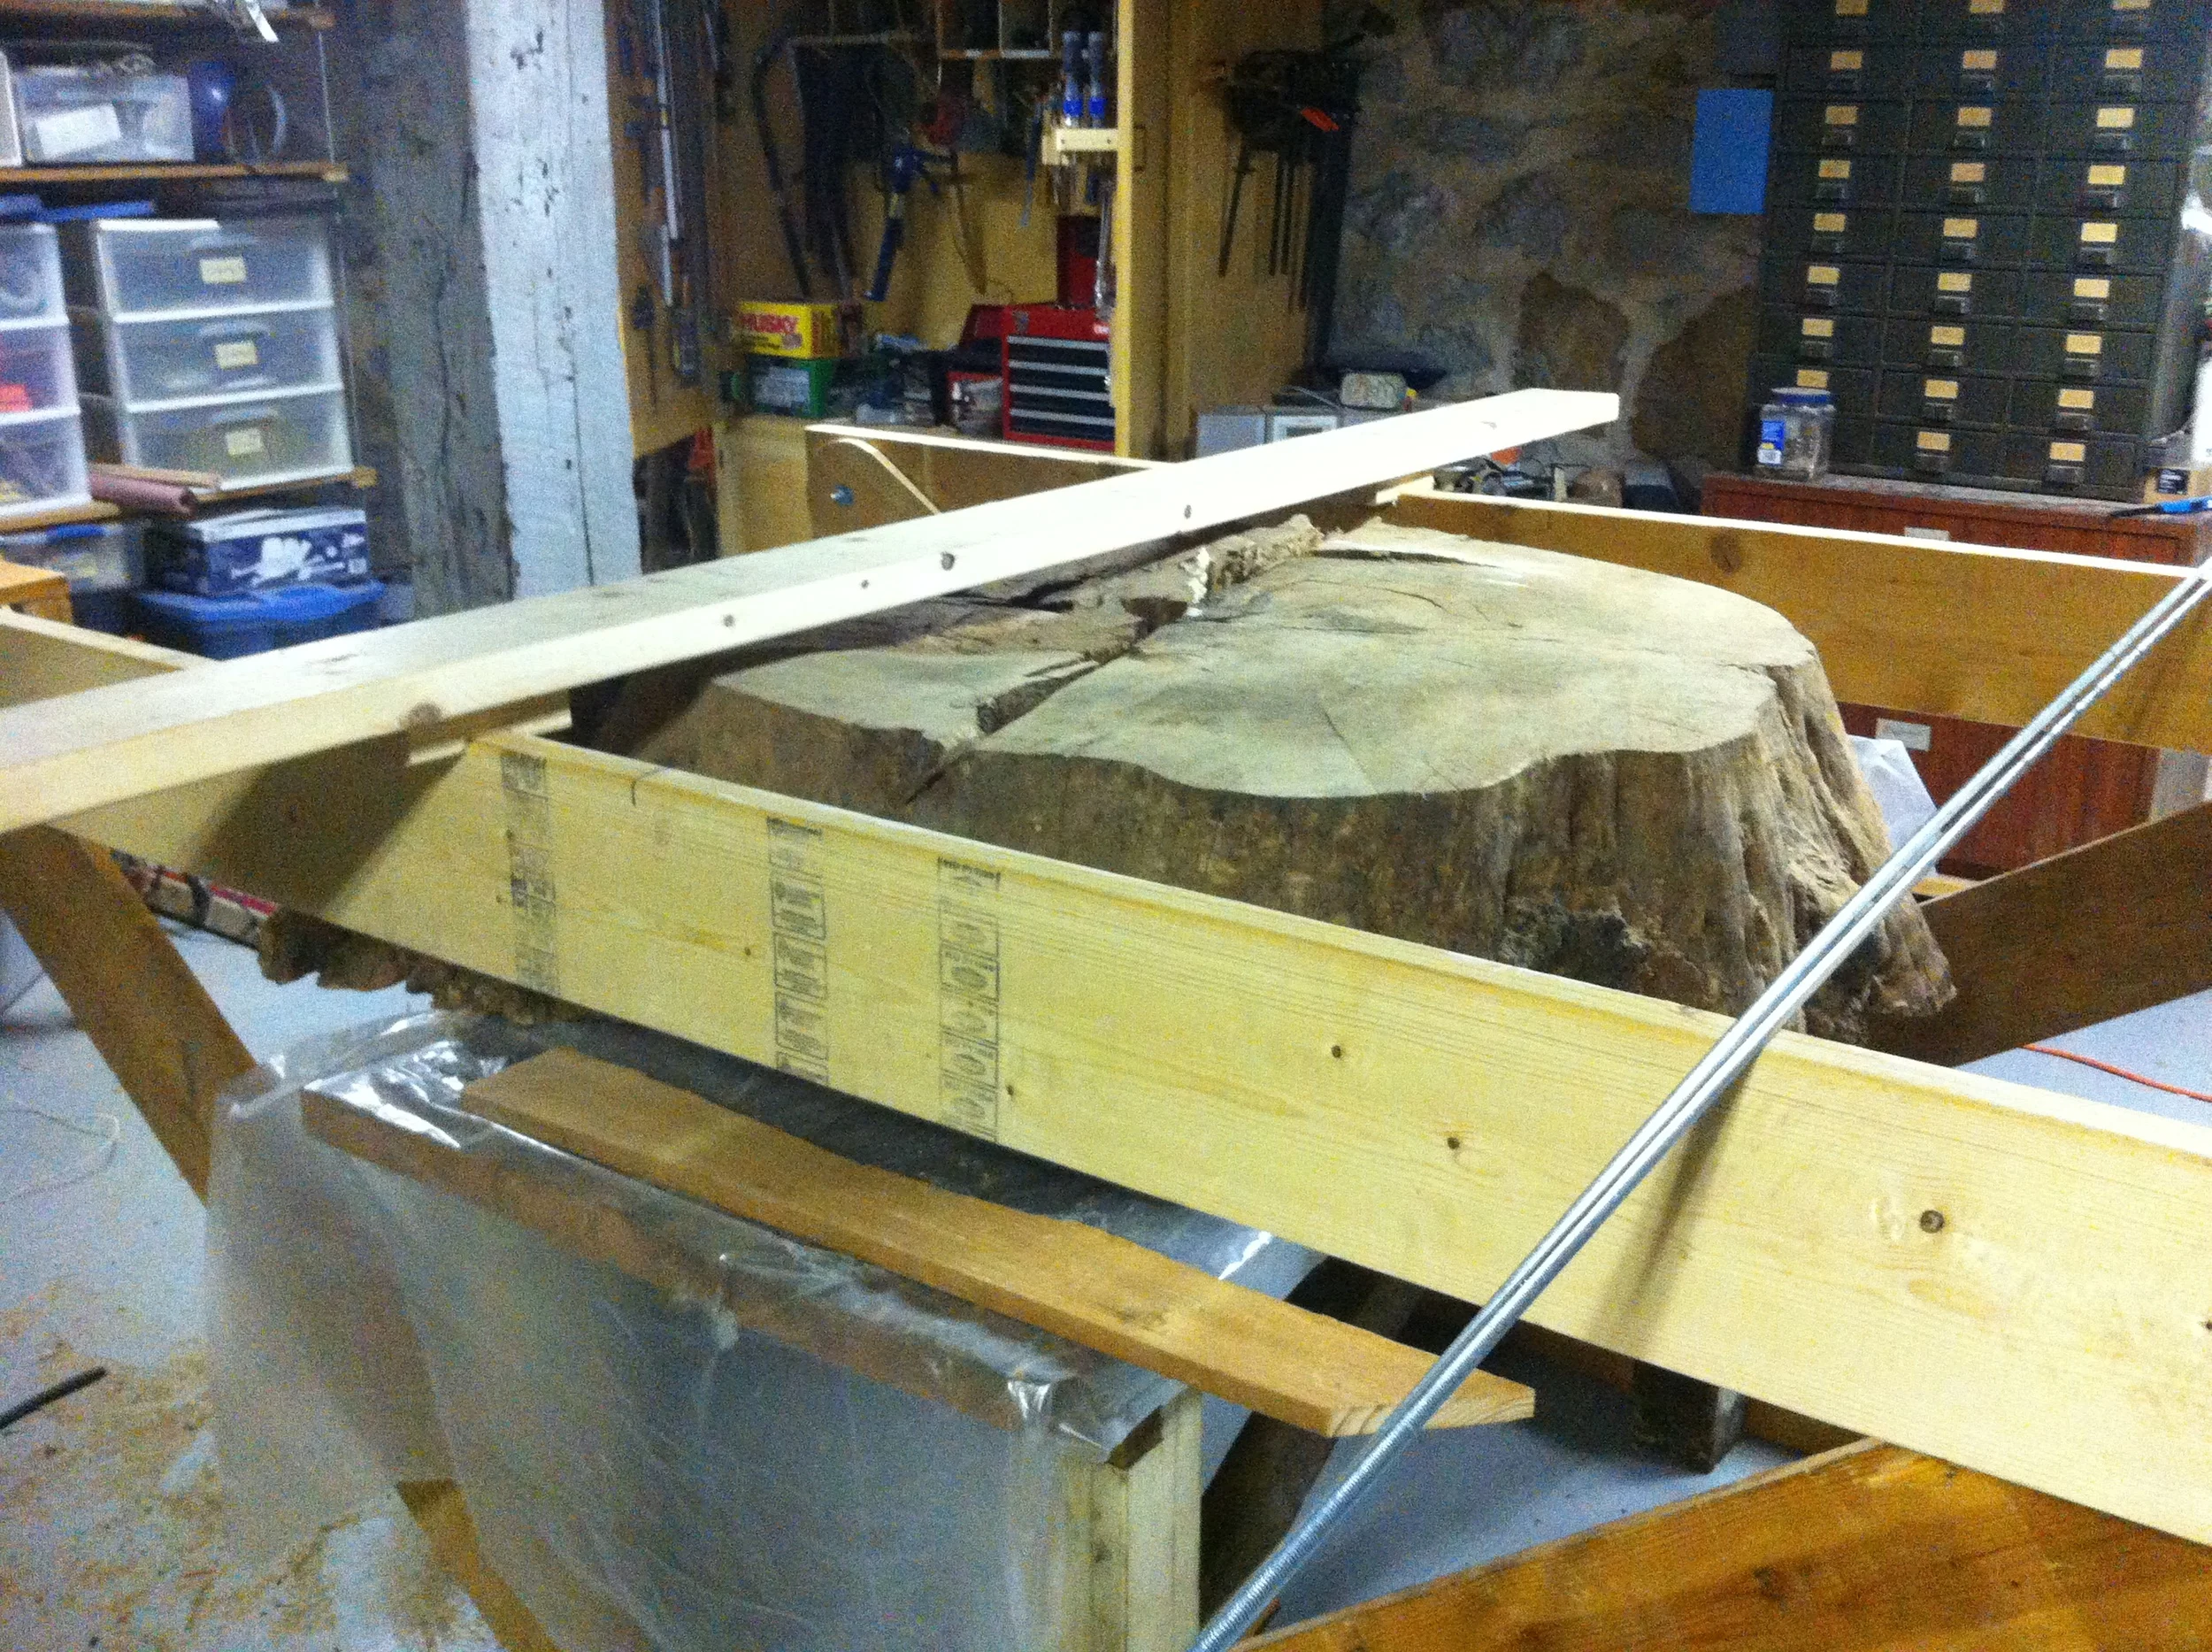
I created a paper template of the outline of the bottom of the stump. I measured in 1 inch from the edge of the outline and cut out the template for the plywood. The 3/4 inch plywood was cut after the template was traced onto the sheet. I used a 1/2 inch round over bit to round over the edge of the plywood and bottom edge of the stump.
I bought 16 of the 10 watt LED's and installed them onto some copper plates to help spread the 160 watts of power. I wired up a full wave rectifier with some large capacitors to smooth the ripple to power the LED's. This circuit was stuffed into the electrical box with the switch.
After triple checking that the lights work I used the router and a sharp chisel to inlay them into the plywood. I also cut holes for the mains plug and electrical box.
To attach the plywood to the stump I sprayed both with a little water and used about 4oz of gorilla glue. To hold the plywood while the glue was curing I used 20 screws.
I was able to flip the stump over without breaking anything, that was a good day.
I found a large lazy susan to amazon which I could use to spin the stump while pouring the epoxy.
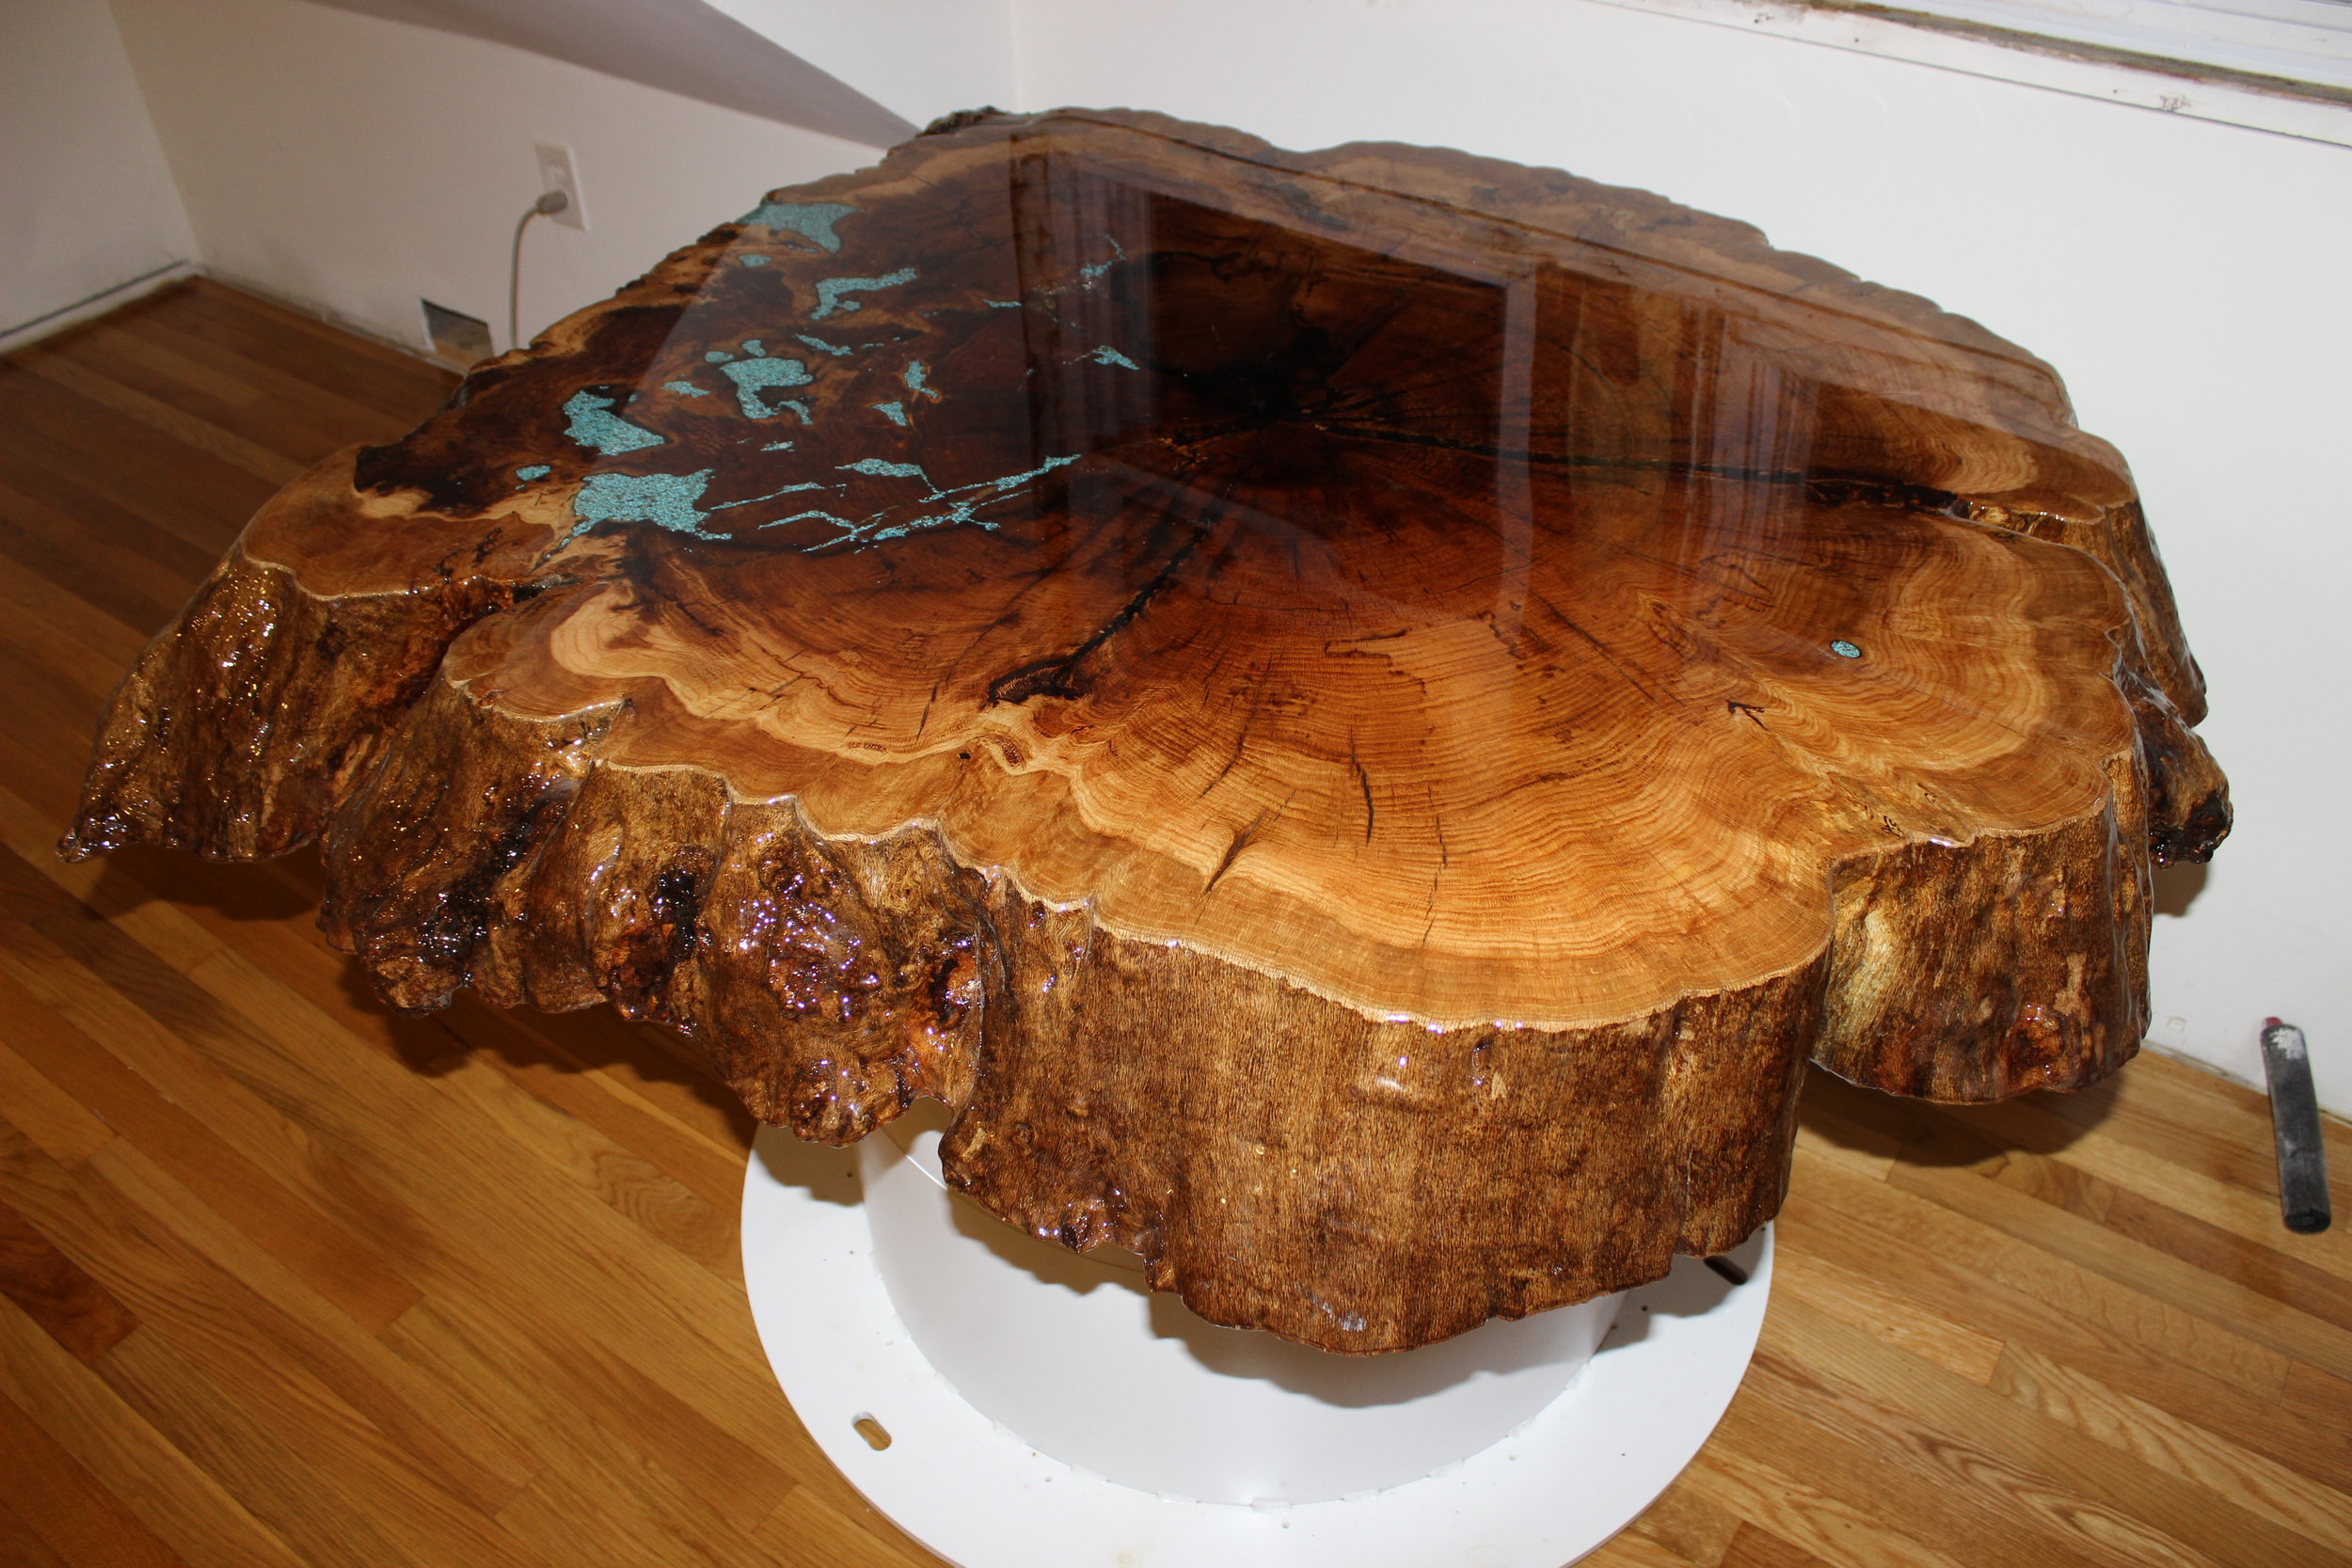
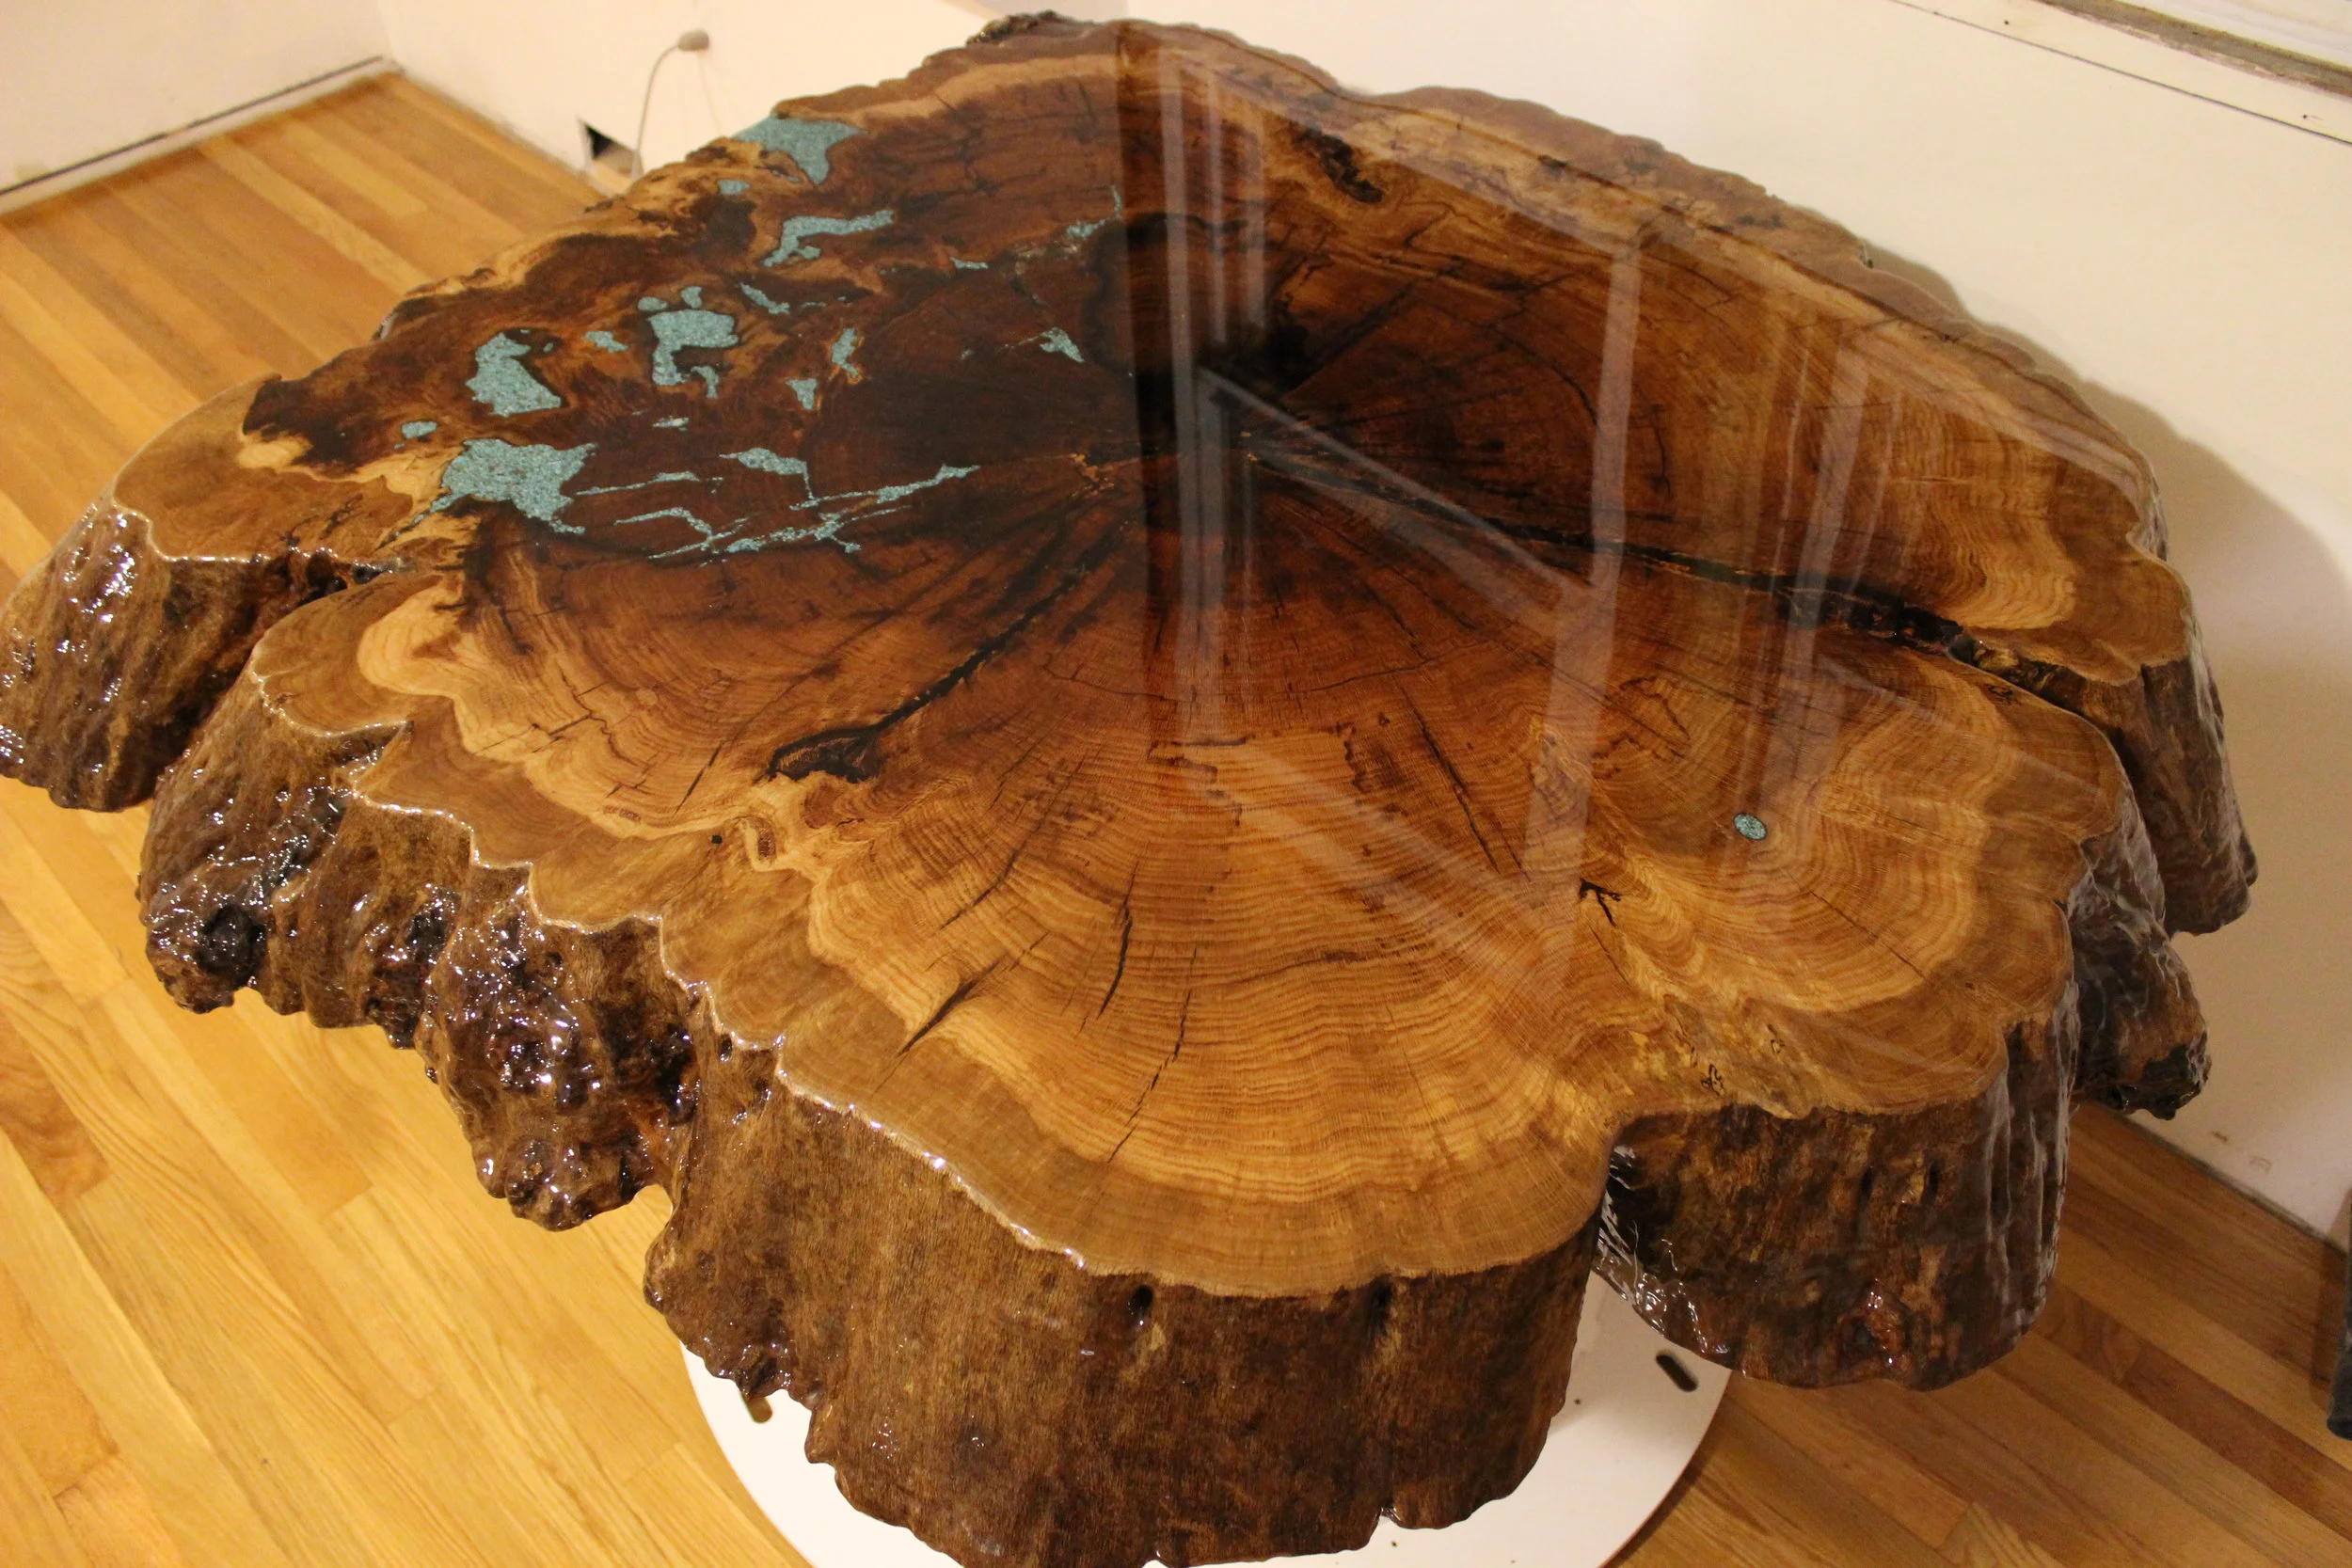
I bought some turquoise ($200) and some epoxy bar top coating (4 gallons). Mixing the turquoise with the epoxy allowed me to pour off the extra epoxy then scrape in the slurry like wet sand into the plexiglass voids with a gloved hand. The hardest part was keeping the turquoise from slumping down over the edge where the turquoise goes from the top to the side of the stump, this was only hard because it needed to be continuously pushed up.
Once all the voids were filled with turquoise or epoxy and cured I used a diamond cup grinder to take down the turquoise and a belt sander on the rest of the face.
I mixed the epoxy in batches small enough where it would not be too much to handle. I used a vacuum chamber to remove most of the bubbles introduced while mixing, and the rest were popped after the pour using a blowtorch on low. I spread the epoxy by hand for about 10 minutes then let it self level and cure. There are about 6 pours on the top and 3 on the sides of the stump.
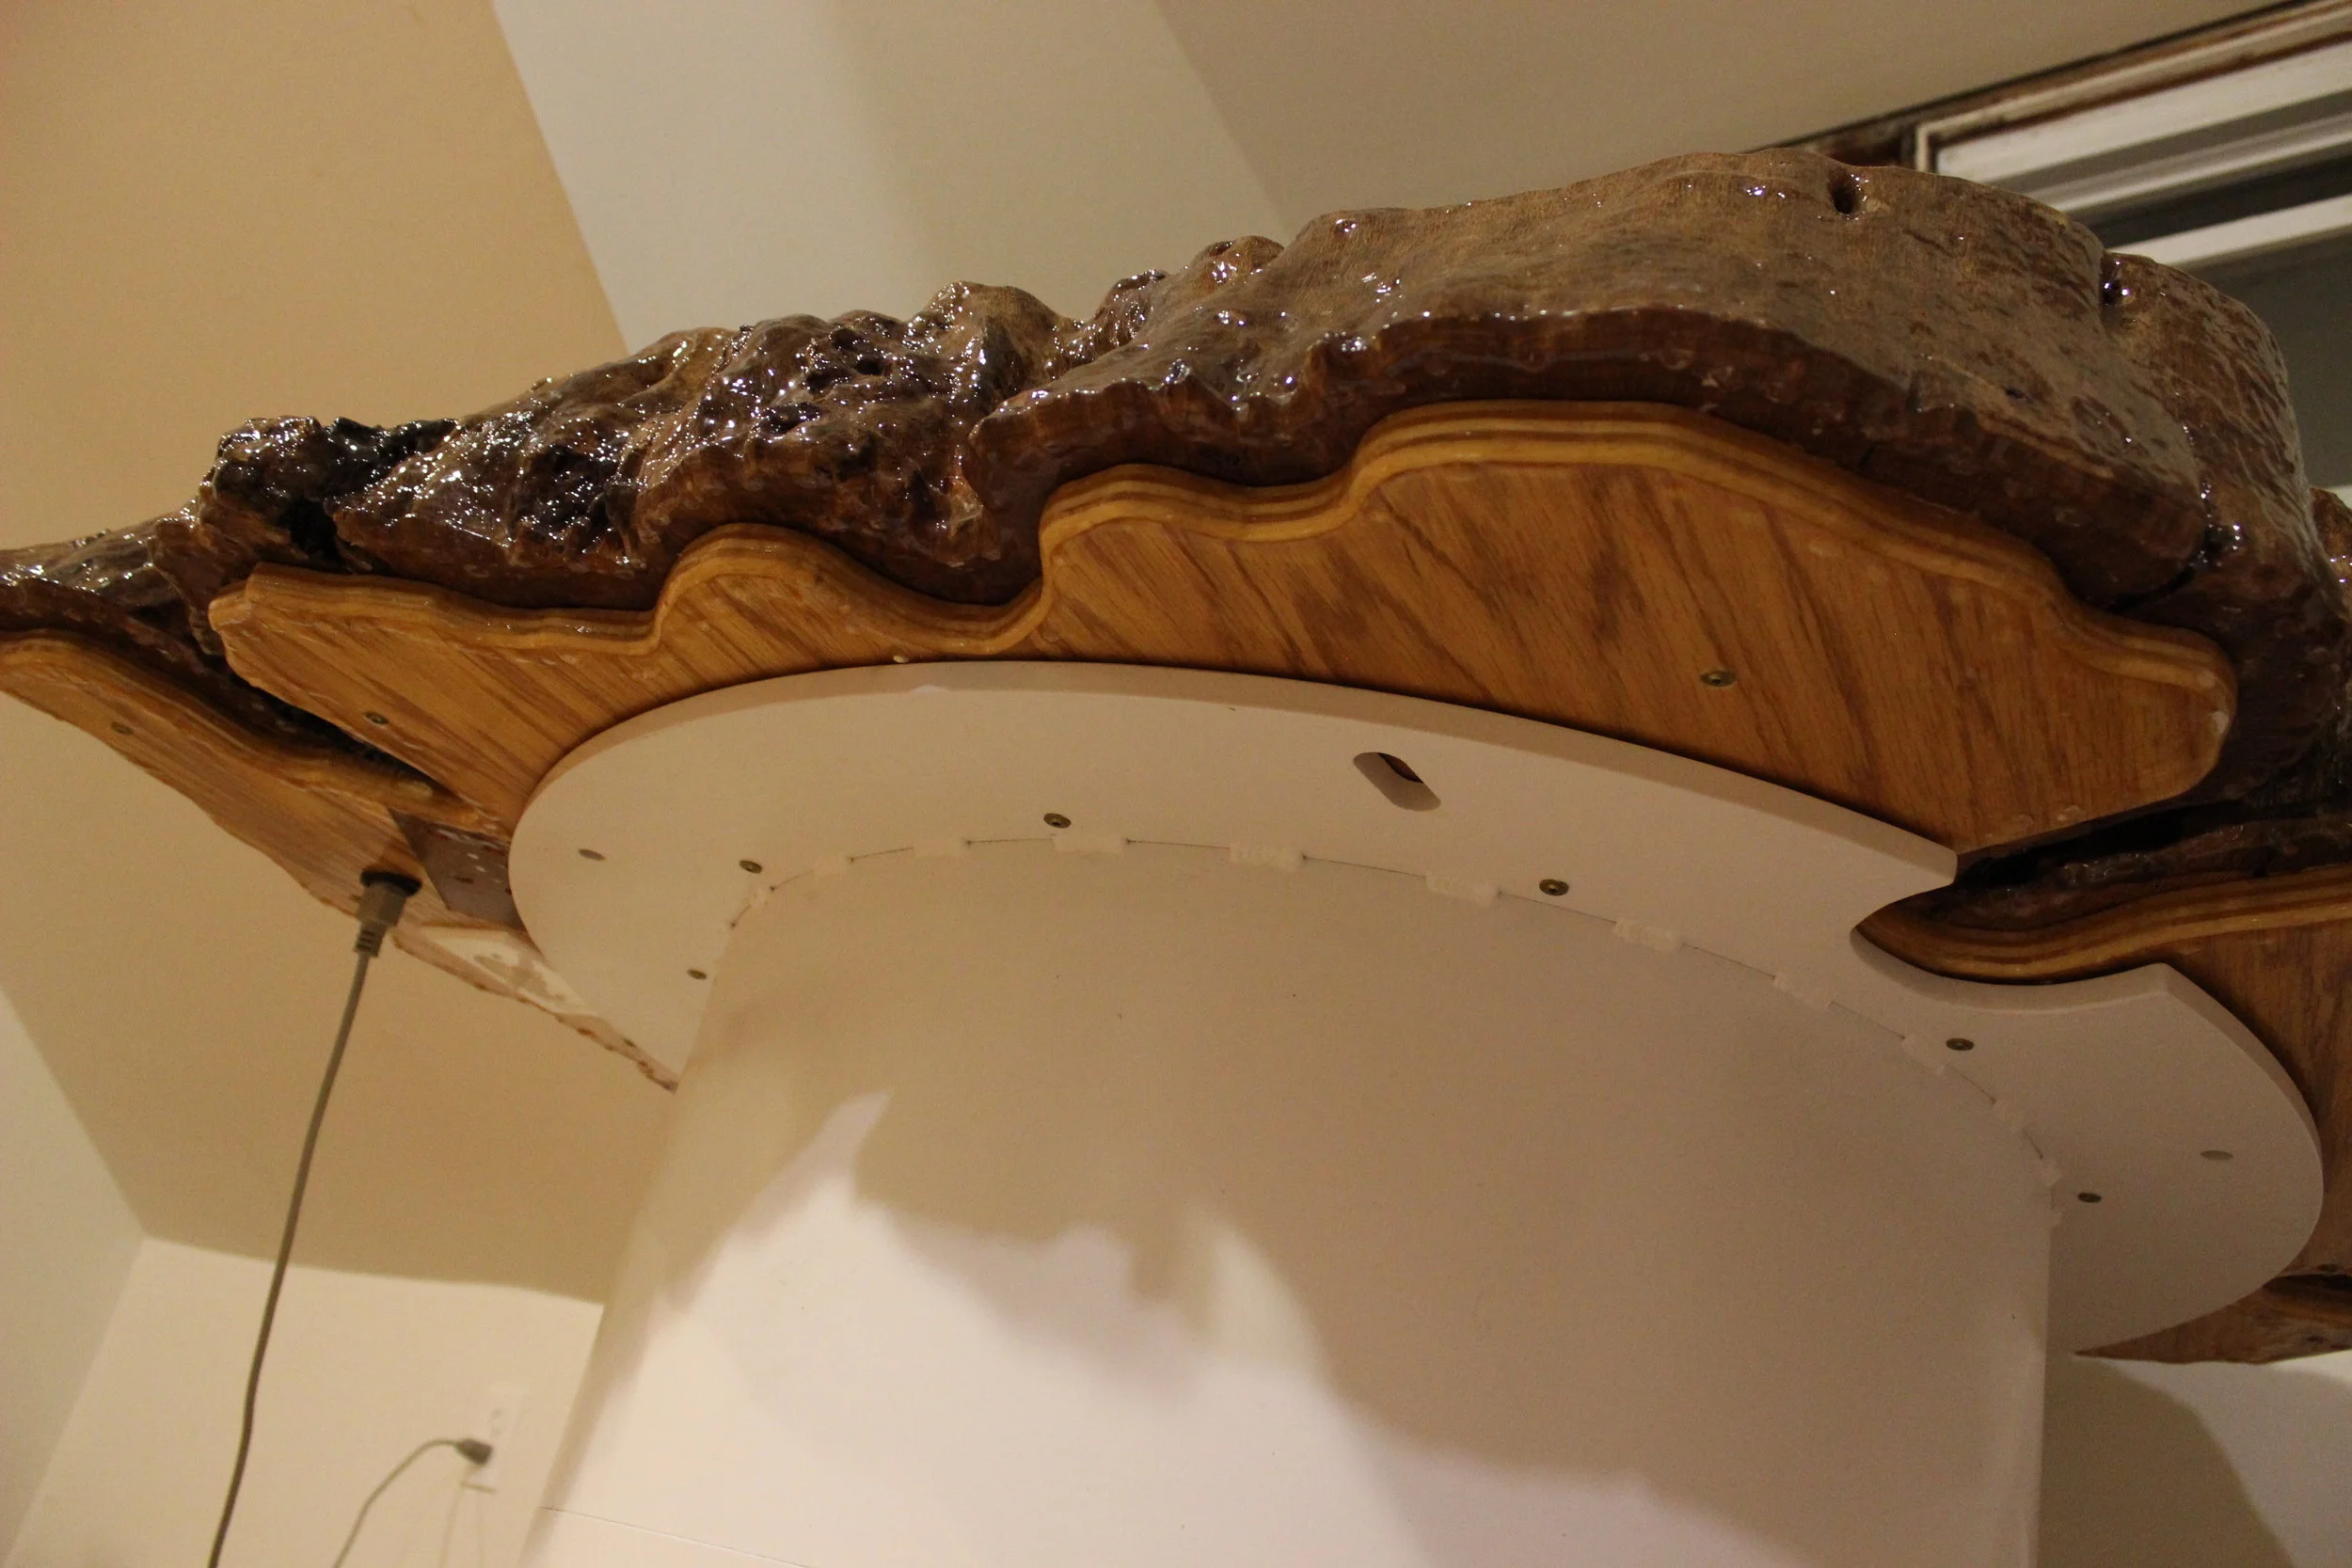
The table base was created by joining two pieces of salvaged equipment. The pieces came from two old satellite dish feed covers.


The grand total for this project is as follows:
- $0 - Stump
- $50 - Plywood
- $5 - Plexiglass
- $20 - LED's
- $5 - Screws
- $250 - Epoxy
- $200 - Turquoise
- $20 - Sandpaper
- $40 - Diamond Cup Wheel
- $0 - Base
$590
I have no idea how many hours I spent working on this thing but it is more than 100 and less than 1000.
I would like to give a special thanks to my neighbor Wian for helping me wrestle this massive piece of furniture up two flights of stairs on Laborday.